Equipment and methods of dyeing used in the Armley Mills Colour Garden (and Health and Safety)

|
If you want to try dyeing using the method developed in the Colour Garden at Armley Mills see the section below. If you just want to read about all the fun we had experimenting with dye plants skip to section two.
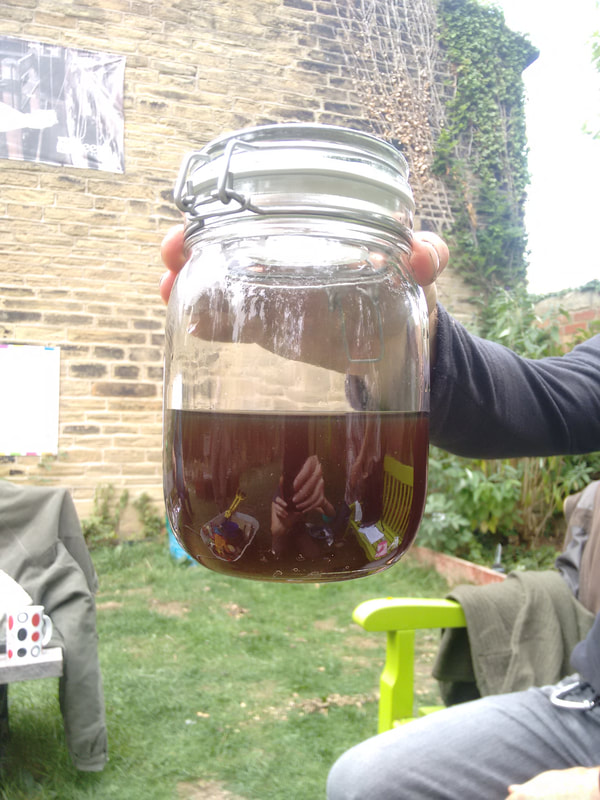
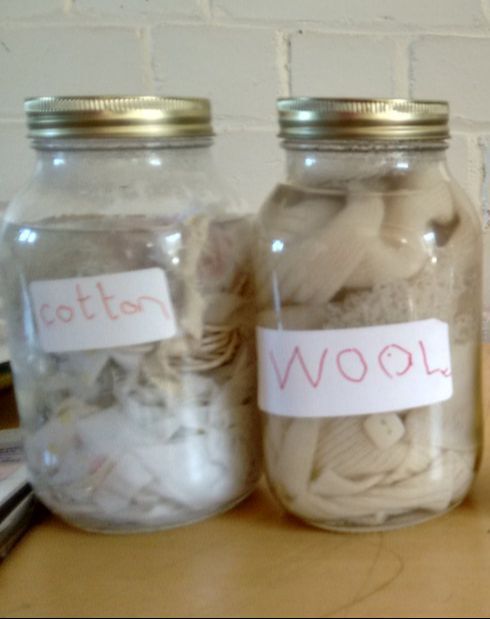
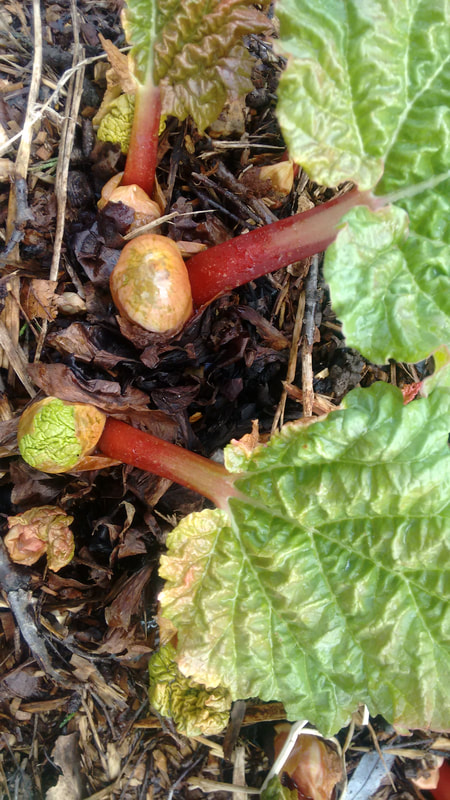
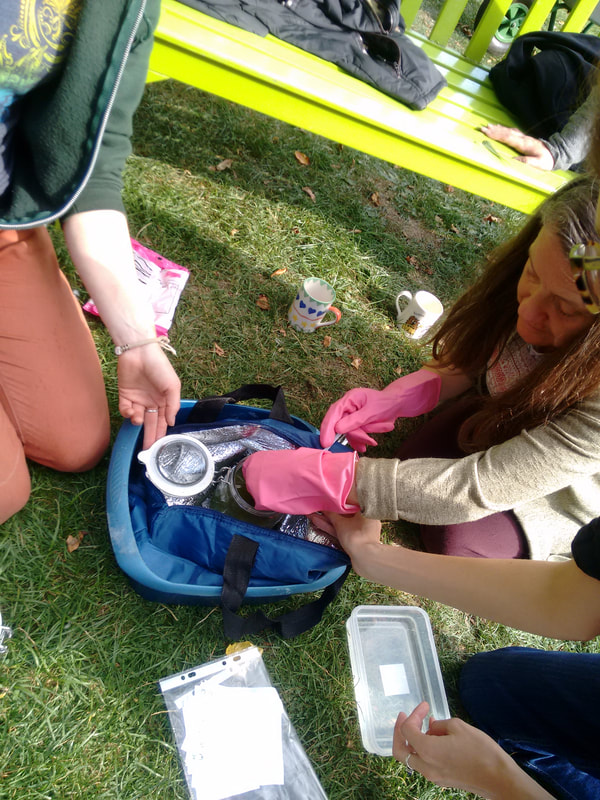
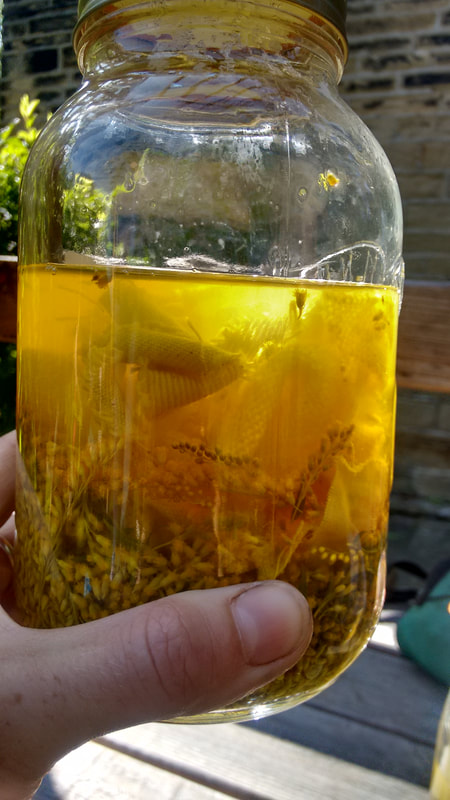
1.1. Equipment The specific equipment used for natural dyeing depends on the preference of the person doing the dyeing. One of the felt-makers in residence at Armley Mills (summer 2018) did her dyeing in a beautiful, large, copper pan. It looked magnificent simmering away on a hot plate, but wouldn’t have been practical for use in the garden. We opted to use large (1.5litre) glass clip-lid jars (traditionally used for preserving fruit). These are ideal for dyeing small quantities of yarn/fabric; using just hot water and a thermal bag. Having a well-fitting, secure, lid is a must when using very hot water with lots of people milling around. Jam jars would also work well, or pots and pans bought from a charity shop. The important thing to remember is that pots used for dyeing should not be used for food preparation. Even if you are not using chemicals, some plants can be poisonous (such as rhubarb root) so food and dye stuff need to be kept separate. To keep the dye pot warm during the dyeing process we used a thermal bag. This is just a turbocharged cool bag you might use for a picnic (the turbocharged bit is that our one has a silver foil lining which reflects the heat). Some dyers use a hay-box to keep their dye pot warm, others an old thermos flask. It does not matter what you use to insulate the dye pot, the important thing is that the heat is retained as long as possible (ideally at least an hour). There is a certain ‘Heath Robinson-ness’ to this style of dyeing, using whatever is to hand to achieve the desired results. We also have a cheap thermometer in our dye kit (but most of the time it remains un-used, instead preferring to guesstimate the temperature). A spoon, some rubber gloves, and a way of drying the fabric after dyeing are also helpful. We tend to hang the fabric to dry outside initially, mindful that dripping dye all over the museum is not a way to become popular. 1.2. What to dye? Natural materials such as cotton, wool and silk are ideal for dyeing. Synthetic material, such as polyester, don’t take up the dye, so are best avoided. When dyeing with madder the wool fibres went an orangey red and the cotton was more pinky in colour. In most of our dye experiments we have added bits of both cotton and wool to the same dye pot to maximise the range of colour achieved. A good source of fabric is to buy a cotton shirt/t-shirt from a charity shop and cut it into lots of smaller pieces (you might get an interesting effect if the stitching is made of a different material to the rest of the garment). Finding pure wool in a charity shop is more difficult as many jumpers are now knitted from synthetic materials. If you are lucky enough to find a plain wool jumper you can either unravel it and use the yarn, or cut it into stripes (because our method of dyeing is prone to felt the wool slightly, it is best to unravel the jumper before dyeing or take advantage of the felting and use strips of fabric). We have also used sheep’s fleece, found on barbed-wire in fields around Yorkshire. If you are using wool in its natural state you need to scour it to remove the grease before dyeing (technically you should scour all fabric before dyeing –but in the introduction I mentioned we cut a few corners and scouring was one of them!). If scouring does appeal to you then info on scouring can be found online. 1.3. To Mordant or not to Mordant? When you first start looking at methods of natural dyeing it all looks quite do-able – put the flower petals in a pot, add hot water etc.… that is until you come to the section where they start talking about mordants. Alum doesn’t sound like something that comes from your average supermarket. This sounds suspiciously like chemistry. And so it is. Mordants are a traditional part of natural dyeing which help the dye attach to the fibre. The heaps of shale left over from Alum extraction in places like the North York Moors are testament to how important mordants were before the dawn of synthetic dyes in the mid to late 19th century. It is possible to use natural dyes without mordants, but the colours may be less bright (when dyed professionally mordants also improve the wash-fastness of some natural dyes). We chose to use mordants because we wanted to achieve the brightest colours the garden could possibly produce. We found an online supplier of natural dyes that would supply small quantities of natural dyes for a sensible price. We mordanted the wool with alum and the cotton with aluminium acetate. We did the modanting using Jenny Dean’s quantities (from her book Colours From Nature, 2009). For the wool and cotton we left the fibres in the jar for over a week. It seemed to work fine for our purposes of producing bright colours. If the aim had been to create stable wash fast colours we might have taken a bit more care with the mordanting (the long soaking might also have decreased the strength of the wool). Once the fibre is mordanted it can be stored and used at a later date –so we did a job lot of mordanting at the beginning of the summer, which we used for the majority of our dye experiments. We decided to mordant our fibre with alum. Various members of the group are now keen to expand this and try mordanting fibres with iron (there is a box of rusty nails being collected in the dye cupboard for this purpose). But if mordants seem a bit too much like chemistry it still might be worth trying natural dyeing without, especially as the history of dyeing must be an evolution, and staining fibres and fleece must have come a long way before anyone thought of adding minerals like alum to the mix. 1.4. Size? The size of your dye pot depends upon what you want to dye. All the fabric we have dyed has been in small pieces or strips –occasionally unfavourably described as’ bits-of-tat’, when left to dry on the washing line! So a 1.5 litre jar works perfectly for our needs. When using natural dyes you need the same weight of dye stuff (flower petals, roots, leaves etc.) to the weight of fibre you want to dye. You also need enough space in the jar for the dye liquid to circulate (to ensure relatively even dyeing). The garden at Armley Mills has the most amazing variety of plants in it. However, even in the specially constructed dye beds the plants are not grown in really large quantities. So small jars and realistic aspirations of how much fibre can be dyed at one time help to achieve the brightest most vibrantly coloured fabric. 1.5. Health and Safety When using natural dyes it is important to conform to basic health and safety. All dyeing should be carried out in containers not used for food preparation. At the end of the dyeing process the dye liquid needs to be disposed of safely, normally down a drain with lots of running water is sufficient. Mordants need to be stored in clearly labelled containers. For dyes such as woad which requires more chemicals, additional care and consideration is required. COSSH and Risk Assessments were completed before we started any dye experiments. The glass jars, when filled with hot water are hot to the touch and need to be handled with care. Although we chose to use jars with well-fitting lid, it is easy to get complacent and shake the filled jars to swirl the dye stuff and fabric in the liquid. On one occasion this resulted in tiny drops of hot water spraying from the jar. Treating all dye pots with dye care, and storing them in a safe location during the dyeing is paramount. We are lucky enough, as a group of volunteers with a range of experiences, to have people who can advise on which plants are poisonous etc. This helps to keep everyone safe. A bit of background reading before starting any dye experiment is always a good idea too. |
